In the ever-evolving world of technology, keeping your computer gear up to date is crucial for maintaining peak performance. Whether you’re a gamer, content creator, or professional seeking enhanced productivity, upgrading your computer components can significantly boost your system’s capabilities. From overclocking techniques to storage solutions, this comprehensive guide explores the latest advancements and optimization strategies to help you squeeze every ounce of power from your machine.
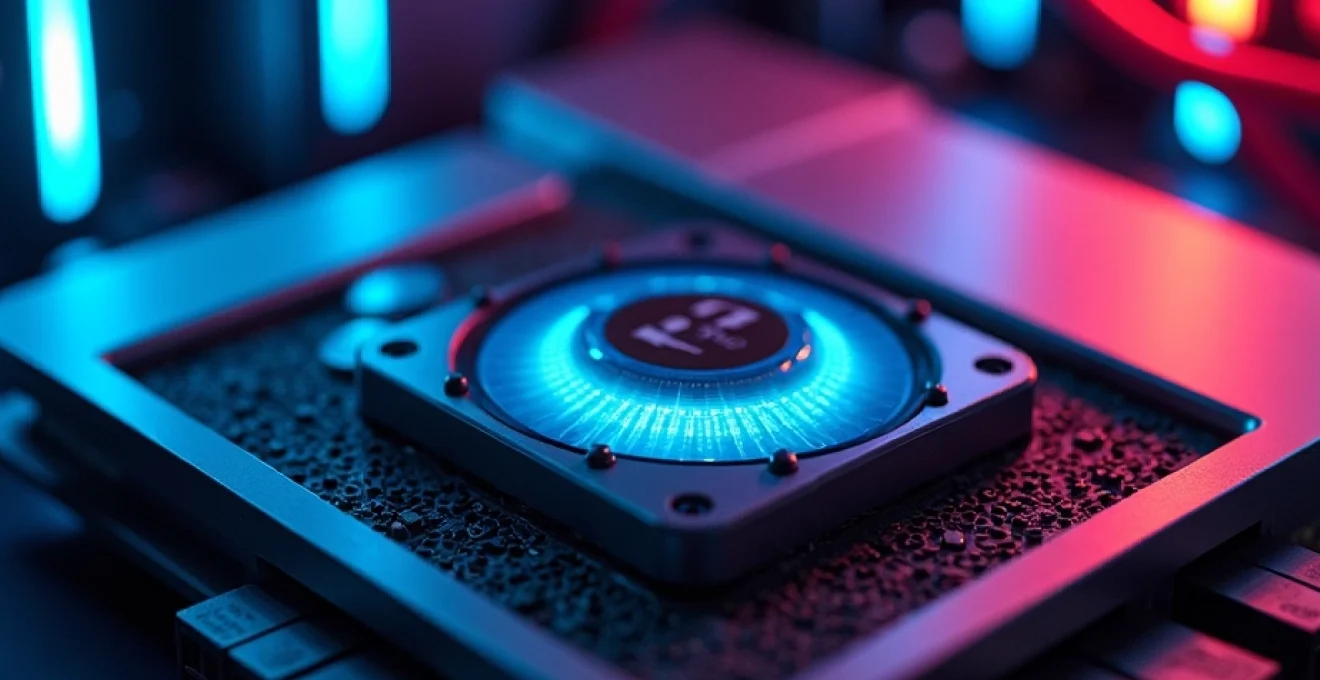
CPU overclocking techniques for enhanced processing power
Overclocking your CPU is a popular method to extract additional performance from your processor. By increasing the clock speed beyond factory settings, you can achieve faster processing times and improved overall system responsiveness. However, it’s essential to approach CPU overclocking with caution and understanding of the underlying principles.
BCLK vs. multiplier overclocking: pros and cons
When it comes to CPU overclocking, two main methods stand out: base clock (BCLK) and multiplier overclocking. BCLK overclocking involves increasing the base frequency of the entire system, which can affect other components like RAM and PCIe devices. On the other hand, multiplier overclocking targets the CPU directly by adjusting its frequency multiplier.
Multiplier overclocking is generally easier and safer, especially for beginners. It allows for more precise control over CPU frequencies without impacting other system components. However, BCLK overclocking can potentially yield higher performance gains, particularly for CPUs with locked multipliers. The trade-off is increased complexity and a higher risk of system instability.
Voltage adjustments and thermal management in CPU overclocking
Successful CPU overclocking often requires increasing the voltage supplied to the processor. This additional power enables the CPU to maintain stability at higher clock speeds. However, voltage adjustments come with a significant caveat: increased heat generation. As you push your CPU beyond its stock specifications, effective thermal management becomes crucial.
Investing in a high-quality cooling solution is essential for any serious overclocking endeavor. Air coolers like the Noctua NH-D15 offer excellent performance for moderate overclocks, while all-in-one (AIO) liquid coolers such as the Corsair H150i Elite Capellix provide superior thermal dissipation for more aggressive overclocking attempts.
Stability testing with prime95 and AIDA64
Once you’ve applied your overclocking settings, thorough stability testing is crucial to ensure your system remains reliable under load. Two popular tools for this purpose are Prime95 and AIDA64. These programs stress your CPU to its limits, helping you identify any instabilities or thermal issues that may arise from your overclock.
Run Prime95’s “Small FFTs” test for at least an hour to check for immediate stability issues. Follow this with an extended AIDA64 system stability test for 4-8 hours to verify long-term reliability. Monitor your CPU temperatures closely during these tests, aiming to keep them below 85°C under full load.
AMD precision boost overdrive and intel turbo boost technology
For those hesitant about manual overclocking, both AMD and Intel offer automated performance-boosting technologies. AMD’s Precision Boost Overdrive (PBO) and Intel’s Turbo Boost Technology dynamically adjust clock speeds based on workload and thermal headroom.
These features provide a safe and easy way to extract additional performance from your CPU without the complexities of manual overclocking. While the gains may not be as significant as aggressive manual overclocks, they offer a balanced approach to improved performance with minimal risk.
RAM optimization: speed, timings, and capacity
Optimizing your system’s RAM can have a substantial impact on overall performance, particularly in memory-intensive tasks like content creation and gaming. Understanding the interplay between RAM speed, timings, and capacity is crucial for achieving the best possible performance from your memory modules.
XMP profiles and manual DRAM frequency tuning
Many high-performance RAM kits come with pre-configured XMP (Extreme Memory Profile) settings. Enabling XMP in your BIOS allows you to easily achieve the advertised speeds and timings of your memory modules. However, for those seeking to push their RAM even further, manual frequency tuning can yield additional performance gains.
When manually adjusting DRAM frequency, it’s important to increase voltage slightly to maintain stability. Start with small increments of 50-100MHz beyond the XMP profile and test thoroughly for stability using tools like MemTest86. Remember that higher frequencies may require looser timings to remain stable.
CAS latency and secondary timing adjustments
While frequency is important, RAM timings play a crucial role in overall memory performance. CAS (Column Address Strobe) latency, often referred to as CL, is the most significant timing parameter. Lower CAS latency values result in faster response times, but may limit the maximum achievable frequency.
Secondary timings such as tRCD, tRP, and tRAS also impact memory performance. Tightening these timings can improve memory throughput, but requires careful testing to ensure stability. Use tools like Ryzen DRAM Calculator for AMD systems or Intel Memory Latency Checker for Intel platforms to find optimal timing configurations for your specific memory modules.
Dual-channel vs. Quad-Channel memory configurations
The number of memory channels your system supports can significantly affect performance. Most consumer platforms support dual-channel memory configurations, while high-end desktop (HEDT) systems often feature quad-channel support.
Dual-channel configurations offer substantial performance improvements over single-channel setups. However, the benefits of quad-channel memory are less pronounced in typical consumer applications. For content creators and professionals working with large datasets, quad-channel memory can provide noticeable performance gains in memory-intensive workloads.
DDR4 vs. DDR5: performance impact and compatibility
The transition from DDR4 to DDR5 memory represents a significant leap in RAM technology. DDR5 offers higher bandwidth and improved power efficiency compared to its predecessor. However, the performance gains in real-world applications are not always as dramatic as the specifications might suggest.
When considering an upgrade to DDR5, factor in the cost of new motherboards and potential CPU upgrades, as DDR5 is not backward compatible with DDR4 systems. For many users, a well-optimized DDR4 setup may still offer excellent performance at a more affordable price point.
GPU upgrades and Fine-Tuning for graphical excellence
The graphics card is often the most critical component for gamers and content creators working with visual media. Upgrading your GPU can provide immediate and substantial performance improvements in gaming and GPU-accelerated applications.
NVIDIA RTX 30 series vs. AMD radeon RX 6000 series comparison
The current generation of graphics cards from NVIDIA and AMD offers impressive performance across various price points. NVIDIA’s RTX 30 series, featuring cards like the RTX 3070 and 3080, excels in ray tracing performance and DLSS technology. AMD’s Radeon RX 6000 series, including the RX 6800 XT and 6900 XT, offers competitive rasterization performance and improved power efficiency.
When choosing between these two lineups, consider factors such as your specific use case, budget, and the importance of features like ray tracing and AI-enhanced upscaling technologies. Both manufacturers provide excellent options, with NVIDIA generally leading in ray tracing performance and AMD offering strong value in traditional rasterization workloads.
GPU core and memory clock overclocking with MSI afterburner
For users looking to extract even more performance from their graphics cards, overclocking is a popular option. MSI Afterburner is a widely used and user-friendly tool for GPU overclocking. It allows you to adjust core and memory clock speeds, as well as voltage and power limits.
When overclocking your GPU, start with small increments of 50-100MHz for both core and memory clocks. Test stability using benchmarks like 3DMark or game-specific stress tests. Monitor temperatures closely, aiming to keep your GPU below 80°C under load. Remember that silicon quality varies, so your results may differ from others with the same GPU model.
DLSS, FSR, and XeSS: AI upscaling technologies
AI-powered upscaling technologies have become increasingly important in modern gaming, offering improved performance without sacrificing visual quality. NVIDIA’s Deep Learning Super Sampling (DLSS), AMD’s FidelityFX Super Resolution (FSR), and Intel’s Xe Super Sampling (XeSS) are the primary contenders in this space.
DLSS is exclusive to NVIDIA RTX cards and often provides the best quality upscaling, particularly in its latest iterations. FSR and XeSS are more widely compatible, working across various GPU brands and even some older hardware. These technologies can significantly boost frame rates, especially at higher resolutions, making them valuable tools for optimizing gaming performance.
Ray tracing performance optimization strategies
Ray tracing technology adds realistic lighting, shadows, and reflections to games, but comes with a substantial performance cost. To optimize ray tracing performance, consider the following strategies:
- Use DLSS or FSR in conjunction with ray tracing to offset the performance impact
- Adjust individual ray tracing settings (e.g., shadows, reflections) to find a balance between quality and performance
- Lower other graphical settings to allocate more resources to ray tracing effects
- Consider upgrading to a more powerful GPU if ray tracing is a priority in your gaming experience
Remember that the impact of ray tracing varies significantly between games, so experimenting with settings on a per-game basis is often necessary to find the optimal configuration.
Storage solutions: SSDs and RAID configurations
Storage technology has seen significant advancements in recent years, with solid-state drives (SSDs) becoming the standard for system drives and high-performance storage. Choosing the right storage solution and configuration can greatly impact your system’s responsiveness and data management capabilities.
Nvme PCIe 4.0 vs. SATA SSDs: speed and application performance
NVMe SSDs connected via PCIe offer substantially higher speeds compared to traditional SATA SSDs. The latest PCIe 4.0 NVMe drives can achieve read speeds of up to 7000 MB/s, dwarfing the maximum 550 MB/s speeds of SATA SSDs. This translates to faster boot times, quicker application launches, and improved performance in tasks involving large file transfers.
For most users, the performance difference between a high-end PCIe 4.0 NVMe SSD and a more affordable PCIe 3.0 NVMe drive may not be noticeable in everyday tasks. However, content creators working with large video files or professionals handling extensive datasets will benefit from the increased bandwidth of PCIe 4.0 drives.
RAID 0, 1, 5, and 10: balancing performance and data redundancy
RAID (Redundant Array of Independent Disks) configurations offer ways to improve storage performance, increase capacity, or enhance data protection. Here’s a brief overview of common RAID levels:
- RAID 0: Stripes data across multiple drives for improved performance, but offers no redundancy
- RAID 1: Mirrors data across two drives, providing full redundancy at the cost of capacity
- RAID 5: Requires at least three drives, offering a balance of performance, capacity, and redundancy
- RAID 10: Combines RAID 1 and 0, providing both redundancy and improved performance, but requires at least four drives
For home users and enthusiasts, RAID 0 can offer increased performance for tasks like video editing, while RAID 1 provides peace of mind through data redundancy. RAID 5 and 10 are more commonly used in professional environments where both performance and data protection are critical.
SSD caching and intel optane memory acceleration
SSD caching involves using a small, fast SSD to accelerate a larger, slower storage device (typically a hard drive). This technology can significantly improve system responsiveness by storing frequently accessed data on the faster SSD.
Intel’s Optane Memory takes this concept further, using ultra-low latency storage to accelerate both SSDs and HDDs. Optane Memory can provide noticeable improvements in system boot times, application launch speeds, and overall responsiveness, particularly when paired with a traditional hard drive.
Cooling systems: air, AIO, and custom loop watercooling
Effective cooling is crucial for maintaining optimal performance and longevity of your computer components. As you push your hardware to its limits through overclocking and demanding workloads, choosing the right cooling solution becomes increasingly important.
Noctua NH-D15 vs. corsair h150i elite capellix: air vs. AIO performance
The debate between air cooling and all-in-one (AIO) liquid cooling is ongoing in the PC enthusiast community. High-end air coolers like the Noctua NH-D15 offer excellent cooling performance, reliability, and low noise levels. They’re also typically more affordable and have fewer points of failure compared to liquid cooling solutions.
AIO coolers like the Corsair H150i Elite Capellix provide superior thermal performance, especially for heavily overclocked CPUs or in cases with limited airflow. They also offer a cleaner aesthetic and can be easier to install in some case configurations. However, they come with a higher price tag and the potential risk of pump failure or liquid leakage over time.
Custom loop components: radiators, pumps, and reservoir selection
For enthusiasts seeking the ultimate in cooling performance and aesthetics, custom loop water cooling is the pinnacle of PC cooling solutions. When planning a custom loop, consider the following key components:
- Radiators: Choose size and thickness based on your case compatibility and cooling requirements
- Pumps: Select based on flow rate needs and noise considerations
- Reservoirs: Consider ease of filling/bleeding and aesthetic preferences
- Tubing and Fittings: Decide between soft or hard tubing based on your desired look and maintenance preferences
Custom loops offer unparalleled cooling performance and the ability to cool both CPUs and GPUs in a single loop. However, they require significant investment in time and money, as well as ongoing maintenance to keep them running optimally.
Thermal paste application techniques and liquid metal considerations
Proper application of thermal interface material is crucial for effective heat transfer between your CPU and cooler. The most common method is the “pea-sized dot” technique, where a small amount of thermal paste is applied to the center of the CPU before installing the cooler.
For users seeking maximum thermal performance, liquid metal thermal compounds like Thermal Grizzly Conductonaut offer superior heat transfer. However, they require careful application due to their electrical conductivity and can be incompatible with certain materials, particularly aluminum.
Fan curve optimization with SpeedFan and BIOS controls
Optimizing your system’s fan curves can help balance cooling performance with noise levels. Many modern motherboards offer fan control options directly in the BIOS, allowing you to set custom fan speed curves based on temperature thresholds.
For more granular control, software like SpeedFan enables you to adjust fan speeds based on various temperature sensors in your system. This can be particularly useful for fine-tuning case fan speeds to respond to GPU temperatures, which may not be possible through BIOS controls alone.
Power supply and cable management for efficiency and aesthetics
A reliable power supply unit (PSU) is the foundation of any high-performance PC build. Proper cable management not only improves system aesthetics but can also contribute to better airflow and thermal performance.
80 PLUS certification: bronze to titanium efficiency ratings
The 80 PLUS certification program sets standards for power supply efficiency, with ratings ranging from Bronze to Titanium. Higher efficiency ratings translate to less energy wasted as heat, resulting in lower electricity costs and improved system reliability. Here’s a breakdown of the efficiency ratings:
- Bronze: 82% efficiency at 20% load, 85% at 50% load, 82% at 100% load
- Silver: 85% efficiency at 20% load, 88% at 50% load, 85% at 100% load
- Gold: 87% efficiency at 20% load, 90% at 50% load, 87% at 100% load
- Platinum: 90% efficiency at 20% load, 92% at 50% load, 89% at 100% load
- Titanium: 90% efficiency at 10% load, 94% at 50% load, 90% at 100% load
While higher-rated PSUs come with a premium price tag, they can pay for themselves over time through reduced energy consumption, especially in systems that are frequently under heavy load or run 24/7.
Modular vs. Non-Modular PSUs: installation and airflow impact
When selecting a power supply, the choice between modular and non-modular designs can significantly impact both installation ease and system airflow. Modular PSUs allow you to connect only the cables you need, reducing clutter and improving airflow within your case. This can be particularly beneficial in smaller form factor builds or systems with complex component layouts.
Non-modular PSUs, while typically more affordable, come with all cables permanently attached. This can lead to excess cabling that needs to be tucked away, potentially obstructing airflow and making cable management more challenging. However, for builders on a budget or those with straightforward system configurations, non-modular PSUs can still offer excellent performance and reliability.
Custom sleeved cables and RGB integration
For enthusiasts looking to elevate their build’s aesthetics, custom sleeved cables and RGB-enabled power supplies offer unique customization options. Custom sleeved cables not only improve the visual appeal of your system but can also contribute to better cable management due to their flexibility and uniform appearance.
Many high-end PSUs now come with RGB lighting options, allowing you to synchronize your power supply’s lighting with other RGB components in your system. This integration can create a cohesive and visually striking build, especially when combined with custom sleeved cables and strategically placed RGB fans or LED strips.
When considering custom cables or RGB PSUs, ensure compatibility with your specific power supply model and motherboard RGB ecosystem to avoid potential issues with connectors or lighting control software.